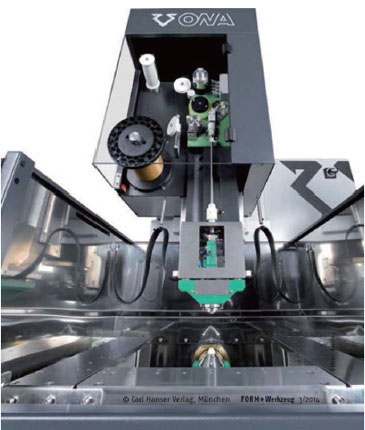
EDM can process conductive materials of any hardness with a processing accuracy of up to 0.001mm without mechanical action. Due to such characteristics, EDM has become one of the key technologies for injection mold and tool manufacturing.
The high degree of logic within this system not only lets the user know that the part has been cut to size and can be removed, but the machine can also correct itself based on the measured data. This capability of the machine is regarded as the most significant achievement, will have a significant impact on “unmanned” production, and will continue to promote the development of EDM wire cutting online measurement needs.
Automatic contact measurement
At present, mechanical clamps are generally installed manually to hold the online measurement probe of the EDM wire cutting machine. However, with the use of a pneumatic chuck, a robotic tool changer can be used to automatically load and unload the detector onto the EDM wire cutting machine.
Most injection mold factories today assign workers to conduct component audits. A machine operator will attach the detector, measure the part, remove the detector, activate the start button, and continue cutting. After cutting, install the detector and run macro B programming to measure the key points of the component. The machine then identifies which parts meet the specifications and which need to be cut again.
In terms of technology, the components required to complete unmanned EDM wire cutting work, including automatic online routine measurements, have become a must. However, few industries currently need to reach that level of sophistication.
Optics: another approach
In addition to contact measurement, there are other online measurement methods. such as optical systems. It does not “touch” the part, but records an image of the part for inspection. Such a system is particularly beneficial for precision manufacturing of components that require the measurement of fine parts.
Injection mold manufacturers can quickly and easily measure parts using optical systems from AgieCharmilles. In front of the optical system, a very complex and sophisticated fixture is installed to clamp the parts and perform accurate measurements. Additionally, the position of the part needs to be determined, and measuring with EDM wire would take longer than actually cutting the part. For example, if cutting took 3 hours, measuring might take 10 hours. After using the optical system, the axial degree, center and cutting starting point of the component can be clearly identified in a moment’s image.
Whether it is an optical system or a mechanical system, each has its own advantages. Optical systems can quickly measure already cut parts (300 points/second), whereas probe measurement methods require physical movement and access to those measurement points. However, the probe measurement method can measure cavities at the top, middle, and bottom of the part. Optical systems can only record two-dimensional images of parts and cannot measure areas such as angled sidewalls.
